Studio is your image management and editing hub in Vela. It automatically identifies images used across multiple listings—like size charts or brand photos—so you can edit or replace them once, and the updates instantly apply everywhere they’re used. Vela’s AI tools make it easy to enhance, crop, and refresh your visuals quickly and then publish directly to your shop without switching tabs.

How to...
- Sort and filter images
- Replace, download and delete images
- Create folders and move images
- Upload new images to Studio
- Use AI enhance to optimize an image
- Remove and replace backgrounds with AI
- Resize images for use across shops and social channels with AI
- Edit alt text
1. Sort and filter images
- Open Studio from the left navigation bar.
- By default, images are sorted with the most-used images at top- those connected to the highest number of listings in your shop. Scroll over an image to see the number of listings it is connected to.
- Click the A-Z icon to change how listings are sorted. You can flip the arrow to prioritize images with the fewest number of listings connected, or change to sort by when the images were edited (most recent/most distant).
- Use Search by title or SKU to locate specific images.
- Remember: each studio is specific to one shop at this time.
2. Replace, download, and delete
- Hover over an image to reveal Replace, Download, or Delete options.
- Replace swaps the image everywhere it appears in that shop’s listings, keeping the image order intact. Ex: Replace the size chart for all your t-shirts by locating the existing size chart in studio and selecting Replace, then uploading the new size chart. All listings that displayed the old image will be refreshed with the new image, in the same position in your listings as the original.
- Download saves the image to your computer.
- Delete removes the image from this studio AND all listings that use it in that shop. Use with caution—there’s no undo.
- To perform these actions in bulk, select multiple images and choose Download or Delete from the top bar.
3. Create folders and move images
- Click New folder and name it.
- Select images and choose Move to folder.
- You can also drag and drop images into existing folders.
- Use folders to group seasonal assets, brand visuals, or background sets.
4. Upload new images
- Click Upload and select files from your computer or drag-and-drop them into studio.
- Wait for the upload to finish; thumbnails will appear once complete.
- Add Alt text to each image so it syncs to all future listings that use it in this shop.
- To use an image in another shop, Download it from this studio, switch to the other shop’s studio, and Upload it there.
5. Use AI enhance to optimize an image
- Open Studio.
- Select a photo. Click the edit icon to open the studio editor.
- Click the enhance icon at left.
- Click AI enhance to automatically improve clarity, lighting, and detail.
- Make any other edits as desired using Vela's filters or the manual slider bars for brightness, exposure, saturation, etc.
- Click Save. Choose Update current photo to update the existing image across all connected listings instantly, or Save as new to keep both versions.
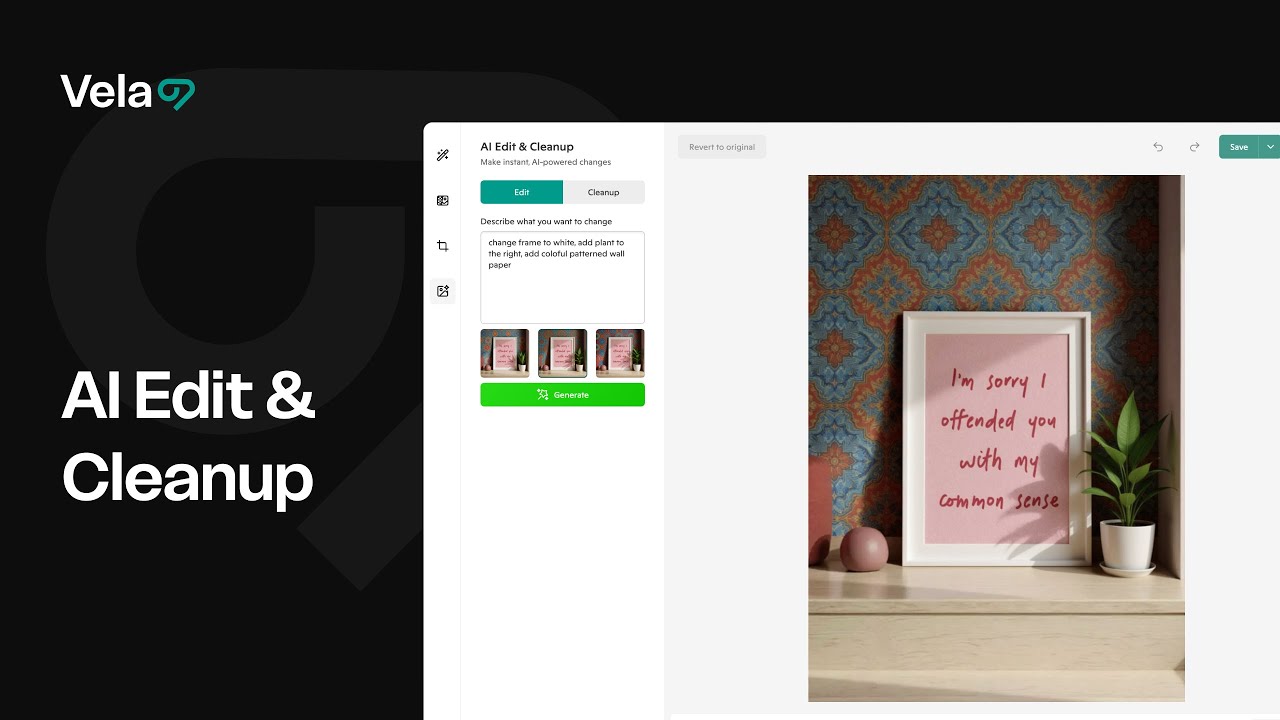
6. Remove and replace backgrounds with AI
- Open Studio.
- Select a photo. Click the edit icon to open the studio editor.
- Click Remove background.
- Endpoints appear around the isolated image. You can use them to scale and rotate the item.
- Standard Generate: To replace the background with a color or photo, choose the color or image from the provided options. You can search our stock library or upload your own image.
- AI Generate: To replace the background with AI, type your prompt into the text box. Click Prompt assist to improve the prompt, or even create a new one from scratch. Click Generate. Three custom scene options appear. Click on the thumbnails to preview the results, then select one or update your prompt and generate again for more options. Generated backgrounds are not saved until you save the selection applied to your image.
- Click Save. Choose Update current photo to update the existing image across all connected listings instantly, or Save as new to keep both versions.
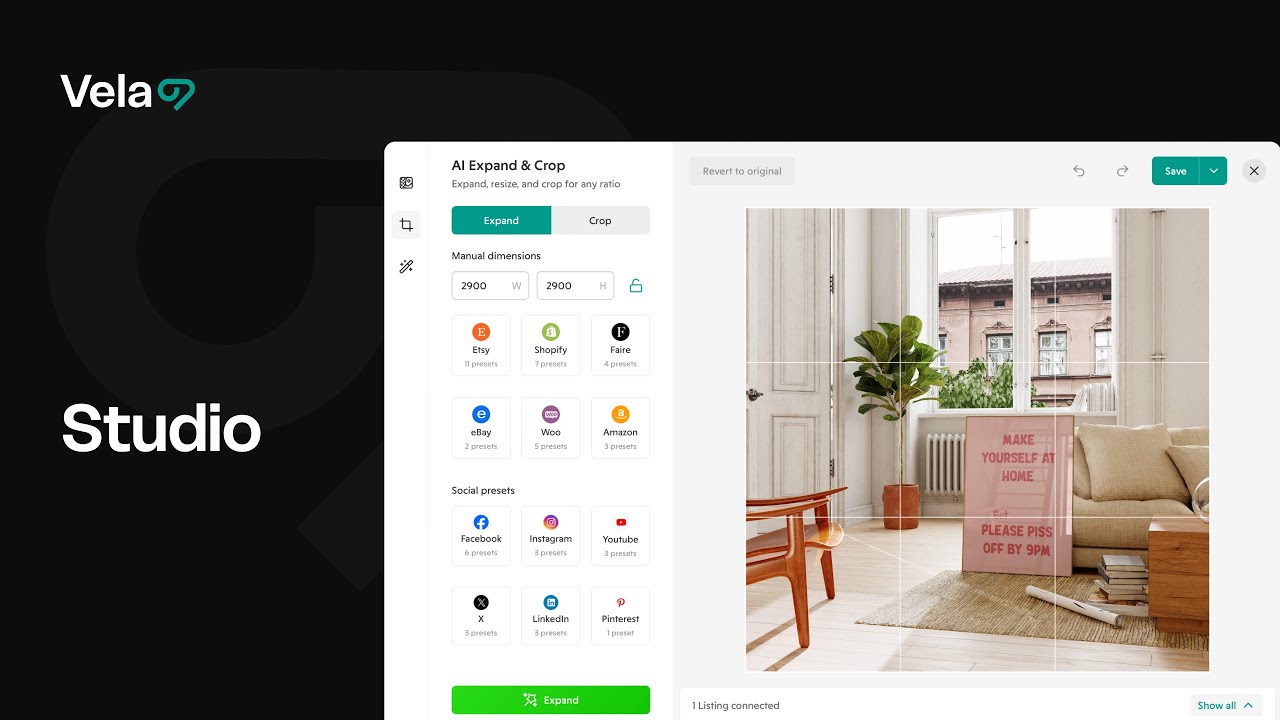
7. Resize images for use across shops and social channels with AI
- Open Studio.
- Select a photo. Click the edit icon to open the studio editor.
- Click the Expand + Crop icon at left. Choose Expand or Crop from the top tabs.
- Choose the aspect ratio or destination for your resized image - you can select any selling platform or social media channel by clicking the logo buttons. Select the intended use for the resized image. Ex: An Instagram story post.
- Click Expand or Crop.
- Save the image for use in your current shop, or Download to use it in other shops or on social media.
8. Edit alt text
- In studio, hover over an image and click the Alt text icon.
- Type the desired alt text or click the magic wand to generate with AI. Alt text should be a descriptive sentence naming the product and key details (for example, “blue enamel mug with speckled finish, 12oz”).
- Click Save. Alt text applies to every listing using this image in the shop.