The Activate Channels feature lets you expand your business by launching your existing listings onto new marketplaces—without recreating them from scratch.
Vela handles the heavy lifting by adapting your listings for each new platform’s structure, formatting, and SEO best practices. You can even preview and refine your new shop’s listings before connecting your account or going live.

How to...
- Know when to use activate channels
- Activate my listings on a new channel
- Understand and use AI copy vs. standard copy
- Edit in the new channel workspace
- Connect and publish to the new shop
- Follow tips & best practices for activating a new channel
- Know what do do next
1. Know when to use activate channels
Use Activate Channels when:
- You’re ready to start selling on a new platform like Etsy, Shopify, Faire, or eBay.
- You want to launch your existing listings without manually rebuilding them.
- You don’t want to spend time researching each marketplace’s SEO rules or listing guidelines—Vela’s optimization handles it automatically.
- You want to test and prepare your listings for a new channel before opening an account or connecting it live.
This feature is perfect for sellers expanding their reach and wanting to stay consistent across multiple marketplaces.
2.Activate my listings on a new channel
Follow these steps to activate and prepare your listings for a new channel:
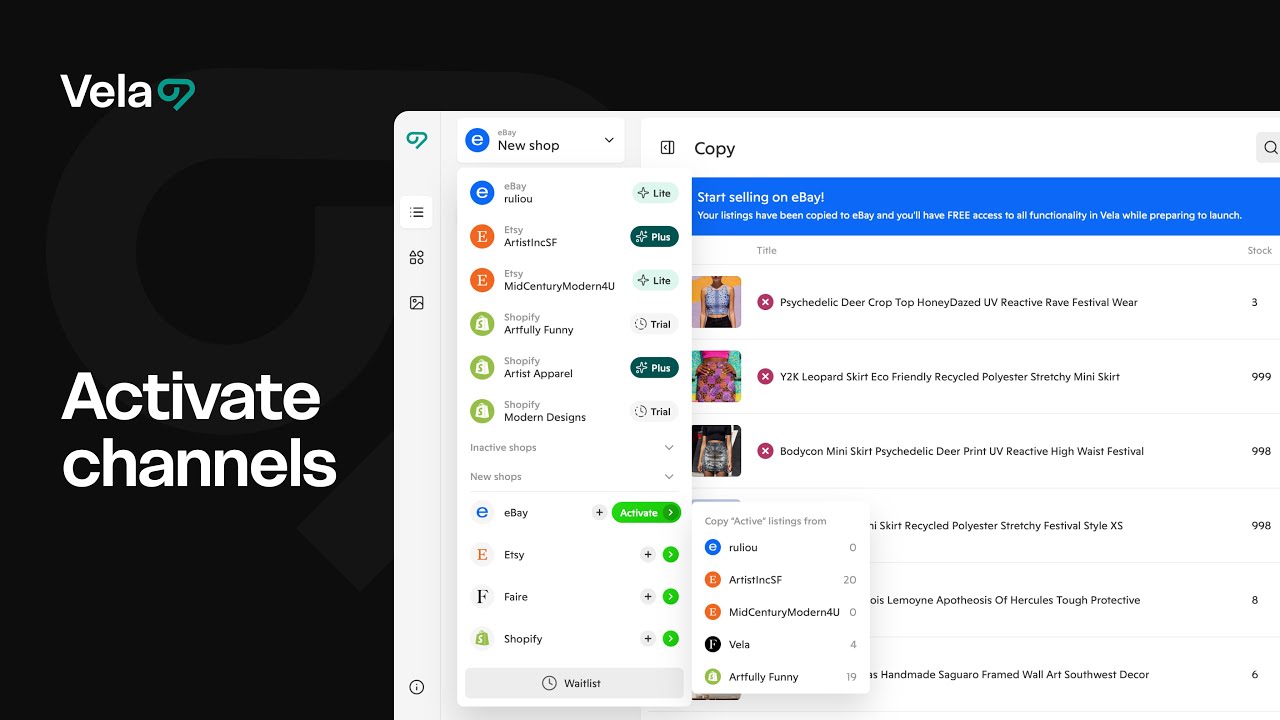
- Click “Add Shop”
This opens the list of supported marketplaces, including Etsy, Shopify, Faire, and eBay. - Choose a Platform
Select the marketplace you’d like to expand to. - Click “Activate”
This begins the activation setup for that platform. - Choose Your Source Shop
Pick which of your existing connected shops will serve as the source for listings you want to copy. - Select Copy Method
Choose between AI Copy or Standard Copy (see below for details).
3. Understand and use AI copy vs. standard copy
When activating a channel, you can choose how Vela prepares your listings for the new marketplace:
- Standard Copy — Transfers your listings exactly as they appear in your source shop.
- AI Copy — Automatically rewrites titles, descriptions, and tags for the new platform’s SEO and formatting rules, saving you time on research and adaptation.
Tip: You can preview results and make manual edits to either version before connecting your shop.
4. Edit in the new channel workspace
After your listings load into the new channel workspace, you’ll have unlimited time to refine them before going live.
Here, you can:
- Edit listings using all Vela tools — including Bulk Edit, Profiles, and Studio.
- Add or remove listings to prepare your shop’s full product lineup.
- Use AI Optimize to adjust tone, formatting, or SEO keywords for the new platform.
This workspace is your private staging area. Nothing publishes until you finish setup and choose to go live.
5. Connect and publish to the new shop
Once your listings are ready:
- Click Activate in the top-right corner of the new workspace.
- This opens a prompt to create a new account or log in to your existing account on the new platform.
- After completing that step, return to Vela and click Connect Shop at the bottom left of your dashboard.
- This authorizes Vela to access your new shop and starts your 7-day free trial.
- Once connected, your listings are ready to publish live to the new shop.
Before publishing, make sure:
- Your new shop is officially live on the marketplace.
- You’ve customized your branding elements—such as logo, colors, and theme—directly within that platform to match your brand’s look and feel. Use the AI background generation and expand tools in studio to generate banners, social media images and more using your listing images as a starting point.
6. Follow tips & best practices for activating a new channel
- Use AI Copy for speed: Especially useful when you’re new to a marketplace’s SEO and formatting rules.
- Refine before connecting: Take advantage of unlimited editing time before linking your new shop.
- Check Quality Scores: Once connected, review scores to fine-tune SEO performance per platform.
- Match your branding: Update shop visuals on the new platform to keep your storefront cohesive.
7. Know what do do next
After activating a new channel:
- Learn how to Copy Listings across shops with AI or Standard Copy.
- Explore Merge to link listings and manage them side by side.
- Visit Schedule to automate updates and launches for your new shop.